Making Purchase Orders
This page helps you to understand 'Making Purchase Orders'.
It's part of the 'Stock' getting-started series.
There are two methods in which an order can be placed.
You can either:
- Send electronically, also own as EDI (Electronic Data Interchange).
- Send manually via email.
Note
Not all suppliers are EDI enabled.
The option to send orders via EDI will only show up if the supplier is EDI enabled.
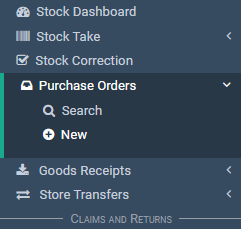
On the main side menu, go to the Stock Management section.
Select 'Purchase Orders' > 'New'.
Understanding The Screen
This section of the tutorial helps you to understand the purchase order search screen.
You're now on the 'Purchase Order' page.
Notice on the first half of the page (purchase order header) there are some options.
Order Reference
This is an optional field where you can add a reference for your purchase order.
Required Date
This field is the date you want to the order to be sent by.
This will impact your OTB depending on the required date being greater than 3 days from when the purchase order was made.
If you set the required date greater than 3 days, the purchase order will not be taken off your OTB.
However when the purchase order reaches within 3 days of the required date the order will then be deducted from your OTB.
Comments
This is where you can put in any information you would like to add for future reference or anything in between.
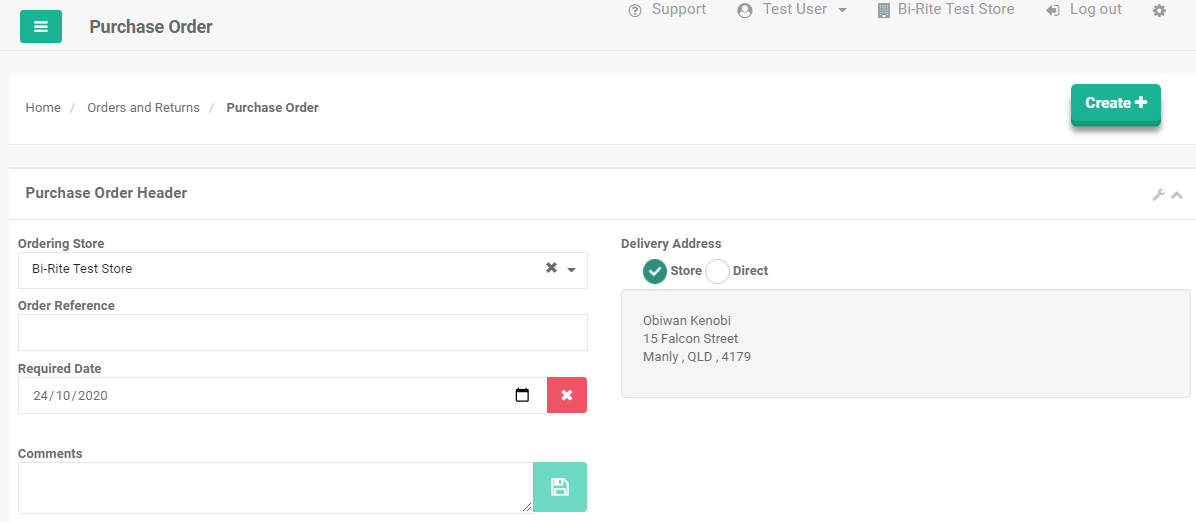
Now you have filled out the details on the purchase order header.
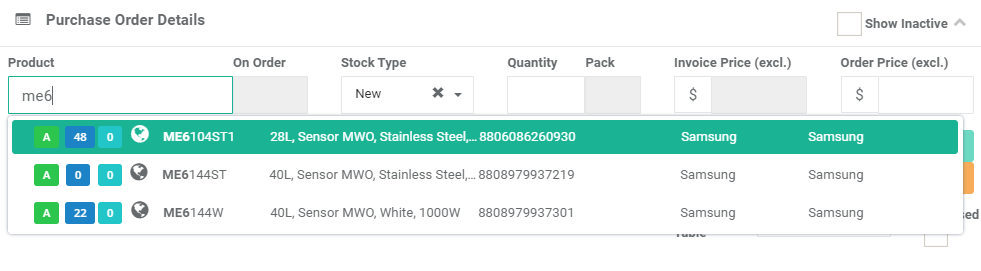
Product Search
Next we add the items you want to order in the 'Purchase Order Details' section.
To add a product, search for the product in the 'Product' field and choose the product by selecting it.
When searching for a product, you'll notice that as you type in the product field, it'll dynamically search for what you're typing and filter the results as you go.
This will help you find what you're looking for.
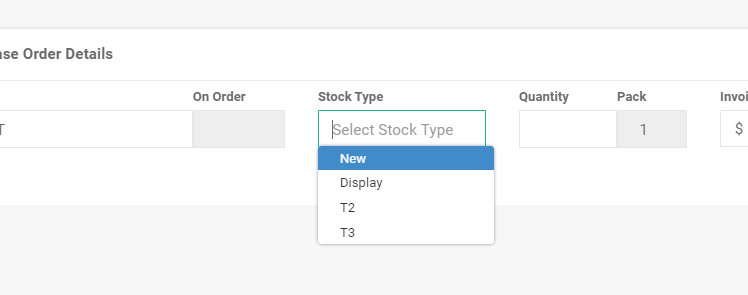
Stock Type
Now we'll choose the the stock type.
There are different stock types you can choose from:
- New
- Display
- T2
- T3
By default the stock type is set to 'New'.
Quantity
Now you'll choose the amount you want to order in the 'Quantity' field.
Pack Size
Keep in mind some products have pack size requirements.
You'll get a warning if you try to order a product with the wrong pack size.
Order Price
Next you can set the order price.
By default KNAPS will load the price for you.
Once you're satisfied with the order line, all you have to do is add it to the order by selecting 'Apply'.

You can add more products to the order by repeating the above steps.
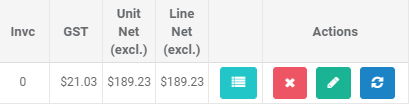
Notice a line has been added to the document main page.
If you want to edit an order line, select the 'Edit' button (pencil icon) under the 'Actions' column.
The line will be loaded into the input boxes we used in the previous steps.
Adjust the order line the select 'Apply' again.
If you wish to delete a line, simply select the red 'X' button on the line you wish to delete.
Now all we have to do is send the order.
To do this, on the bottom of the screen you'll see a couple of options:
- Refresh Prices
- Supplier Contact
- Cancel
- EDI Send
- Complete
- Save

Cancel
The 'Cancel' button will essentially delete the order.
Attention
If you wish to cancel a purchase order that has been sent , you'll need to call the supplier and cancel the order as well.
Failing to do so will result the purchase order being fulfilled.
EDI Send
The 'EDI Send' button will send the order electronically to the supplier.
As mentioned at the top of the tutorial, not all suppliers are enabled for EDI ordering in KNAPS.
If a supplier is EDI enabled, it'll give you the option to send the order via EDI as seen in the picture above.
Complete
The 'Complete' button will give you the options of send the order via email or to print.
In the next section of this tutorial we'll see how to send a purchase order via EDI in a little more detail.
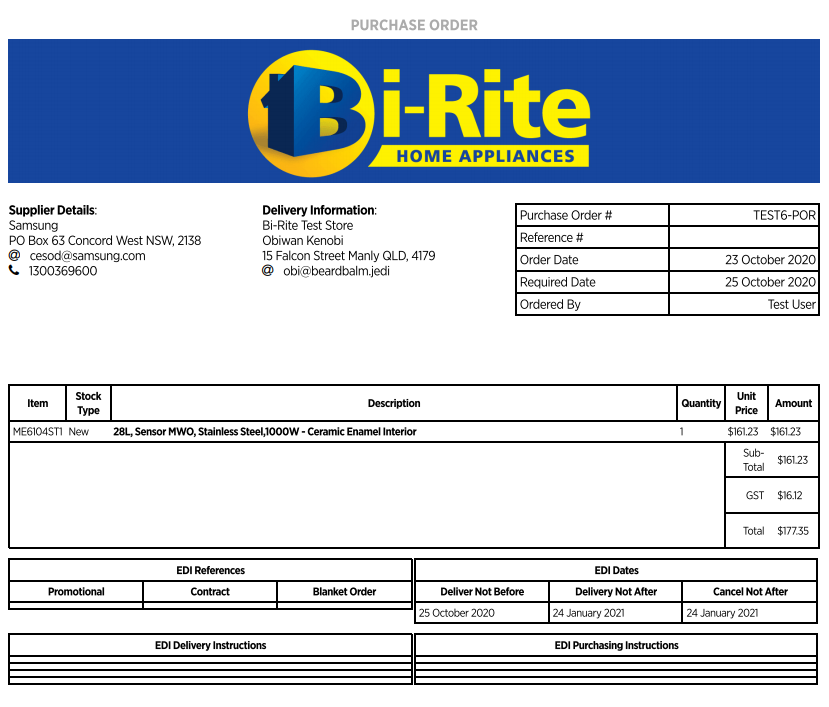
Sending EDI
This section of the tutorial describes how to send an order via EDI.
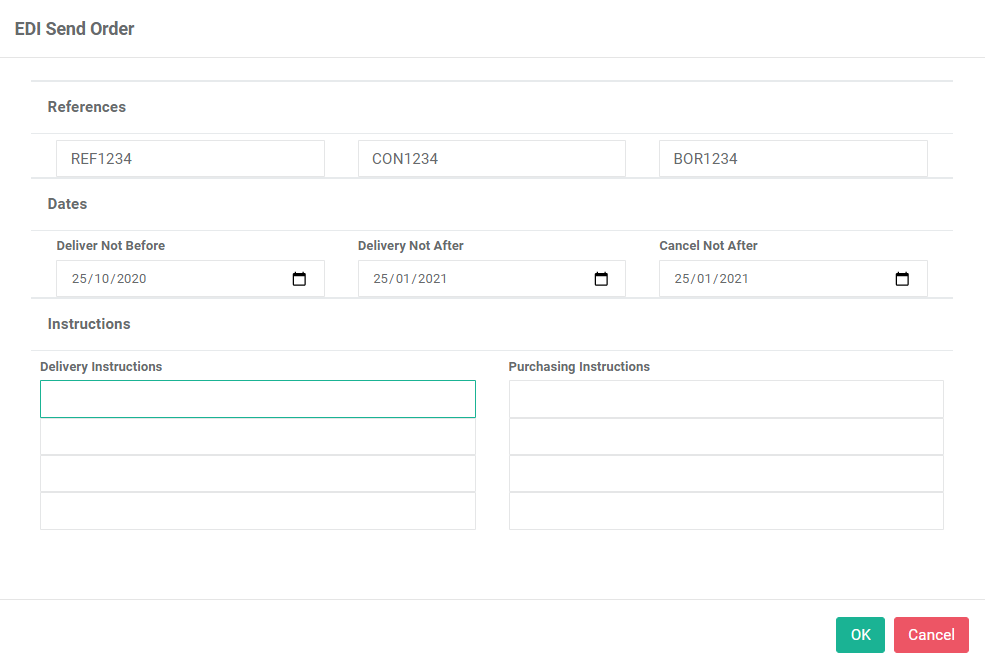
The first step is to select the 'EDI Send' button.

A pop-up will appear.
Here's where you can add your references.
If your rep or supplier has given those details you can add these references:
- Promotional
- Contract
- Blanket order
Additionally you can add delivery or purchasing instructions to the supplier.
Once you're happy with the details select 'OK' to finalise the order.
Sending Manually
This section of the tutorial describes how to send an order manually.
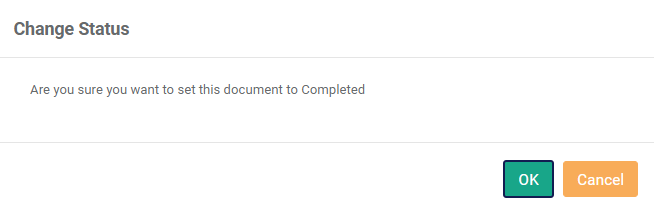
To do this select the 'Complete' button.
You'll be asked 'Are you sure you want to set this document to Completed?'.
Select 'OK'.
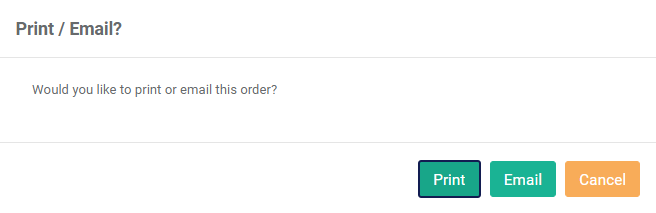
Then you'll get the option to either print or email the order.
If you would like to print the order, simply select the 'Print' button.
A new tab will open in Google Chrome.
From here you'll be able to print the order by selecting 'Print'.
If you choose to email the order, a new pop will appear.
Here you'll be able to add CC and BCC contact to the email.
Note
If there's a default contact that has been setup for the supplier, KNAPS will automatically prefill the send to: address field to the default contact.
Once you're happy with the email select 'Send'.

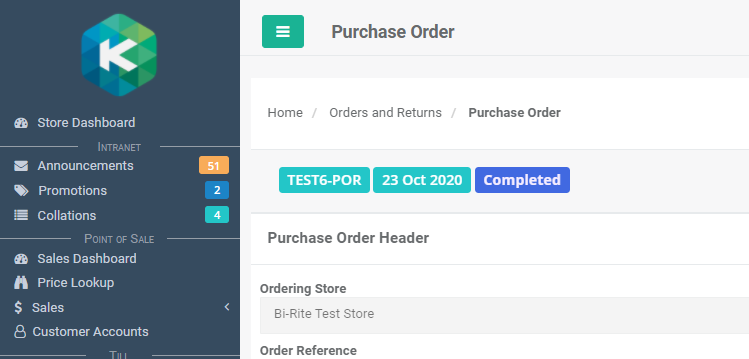
If your have completed or sent the order successfully, your order should be in a 'Complete' state.
You can check this by looking at the purchase order header at the top of the screen.
Closing Lines
This section of the tutorial describes how to close purchase order lines.
It's possible to close individual lines of a purchase order.
Perhaps the line was not supplied by the supplier.
First step is to select the line.
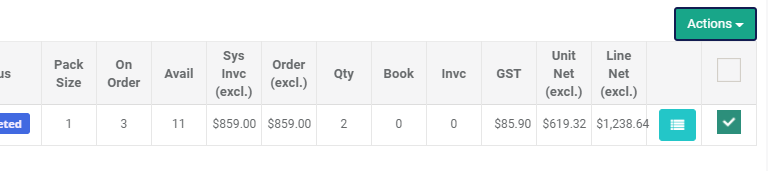
Select 'Actions', and then select 'Close Selected'.
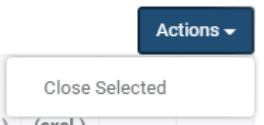
Confirm by selecting 'OK'.
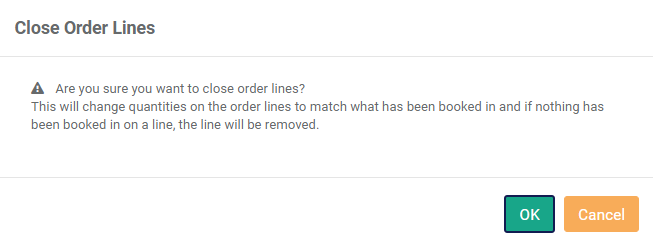
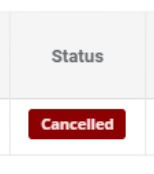
The line is now closed with zero quantity.
The line status is 'Cancelled'.
Related Tutorials 
Stock