How To Upload Customers
This page helps you to 'Upload Customers'.
It's part of the 'Sales/Customer Accounts' how-to series.
Steps:
In the main menu, go to the Point Of Sale section.
Select 'Customer Accounts'.
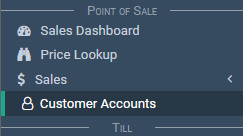
The customer account screen appears.
Select the 'Create' button.

Next, select the spanner/wrench on the top right of the screen.
Select 'Upload Customers'.
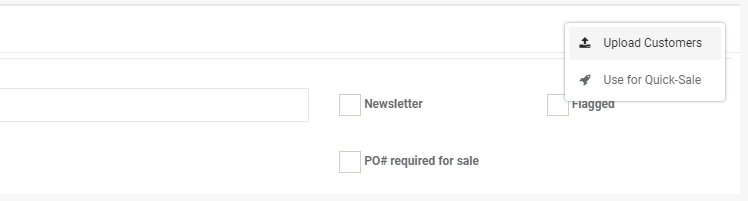
A pop-up appears.
First, read the 'NOTE' section for more detailed instructions.
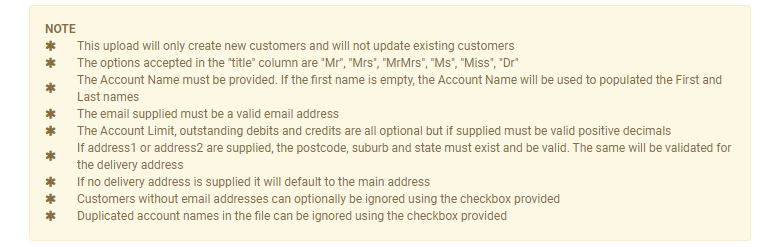
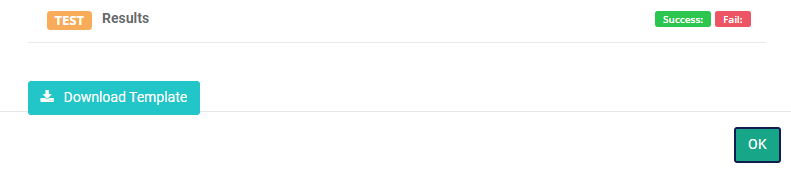
Select the 'Download Template' button to download a CSV file.

Open the CSV file.
Notice the first row.
This is a template row.
-
Begin to enter you customers using the template row as a guide.
-
Be sure to remove the template row before uploading.
-
Save the CSV file.

Once the file is ready, go back to the 'Upload Customers' pop-up.
Notice there are two check boxes:
- Only upload customers with emails
- Allow duplicate customer names
Select them if needed.

Select the 'Choose File' button.

Browse the CSV file from the file location and select it.
Note
The uploader only accepts CSV format.
Make sure you're in test mode.

Select the 'Upload' button.

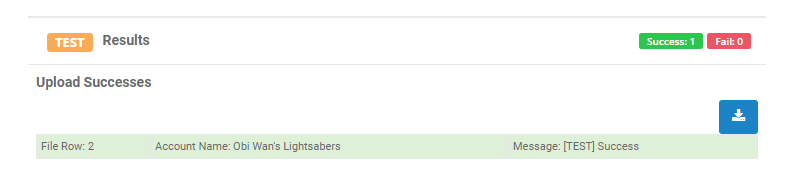
Notice the upload results section.
- Successful rows (green)
- Errors (red)
If you see errors:
-
Try to fix the errors listed
-
Then, try the upload again
-
Repeat until you see no more errors
Turn off the test switch.

This takes you to live mode.
Notice the status changes to 'Live'.

Select the 'Upload' button again.
Notice the upload results section.
Your upload is complete.
Related How-tos 
Customer Accounts