Making Print Lists
This page helps you to understand 'Making Print Lists'.
It's part of the 'Products' getting-started series.
Header Images
This section describes how to upload and manage print-list headers.
Uploading Header Images
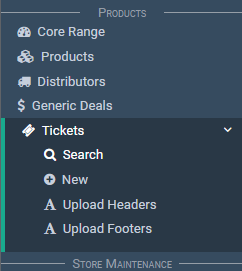
In the main menu on the left of screen, go to the Products section.
Select 'Tickets' > 'Upload Headers'.
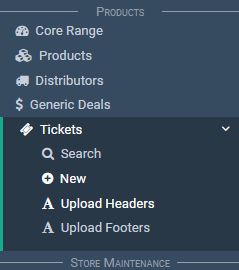
Select 'Choose File'.
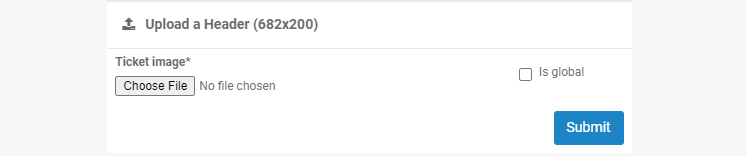
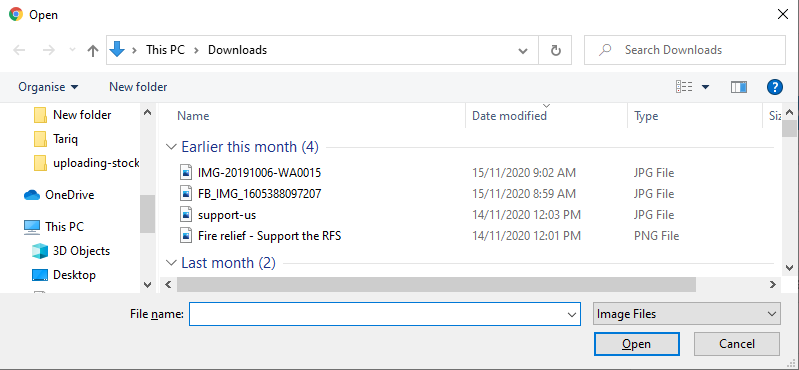
Select your image from the file selector.
Tip
Use an image size of 682x200 for optimal display, otherwise parts of the image will be cut off.
Select 'Submit'.

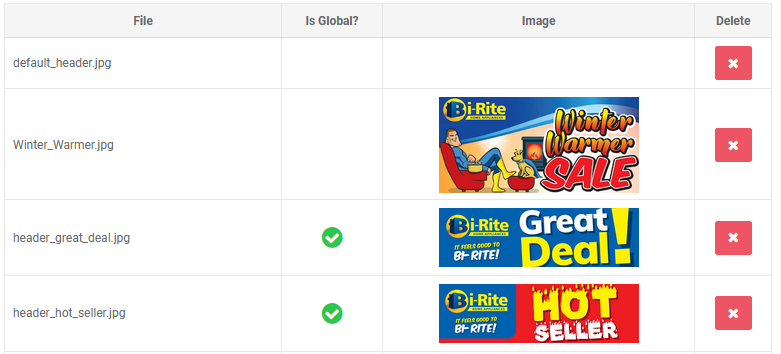
Notice the image appears in the list of header images
Global Images
Notice the 'Is Global' column.
![]()
'Is Global' means:
- Head office uploaded the image
- A store can use the image
Deleting Header Images
In the main menu on the left of screen, go to the Products section.
Select 'Tickets' > 'Upload Headers'.
Notice the list of header images.
Locate the image to delete and select the 'Delete Icon'.

A confirm panel will appear.
Select 'Yes'.
Notice the header is removed from the list.
Setting Global Header Images
Note
This is a 'head office only' process.
Follow the same steps in Uploading Header Images.
Make sure to select the 'Is Global' checkbox.

Footer Images
This section describes how to upload and manage print-list footers.
Uploading Footer Images
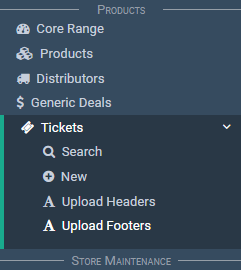
In the main menu on the left of screen, go to the Products section.
Select 'Tickets' > 'Upload Footers'.
Select 'Choose File'.
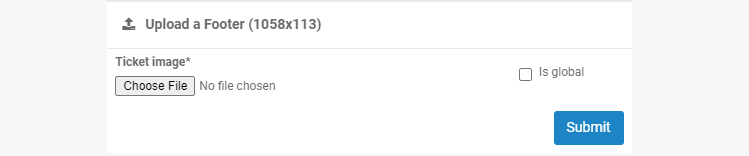
Select your image from the file selector.
Tip
Use an image size of 1058x113 for optimal display, otherwise parts of the image will be cut off.
Select 'Submit'.
Notice the image appears in the list of footer images
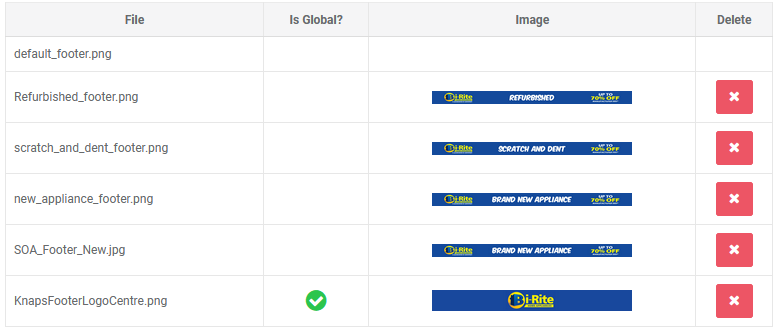
Global Images
Notice the 'Is Global' column.
![]()
'Is Global' means:
- Head office uploaded the image
- A store can use the image
Deleting Footer Images
In the main menu on the left of screen, go to the Products section.
Select 'Tickets' > 'Upload Footers'.
Notice the list of footer images.
Locate the image to delete and select the 'Delete Icon'.

A confirm panel will appear.
Select 'Yes'.
Notice the footer is removed from the list.
Setting Global Footer Images
Note
This is a 'head office only' process.
Follow the same steps in Uploading Footer Images.
Make sure to select the 'Is Global' checkbox.
Creating Print-lists
This section describes how to create print-lists.
In the main menu on the left of screen, go to the Products section.
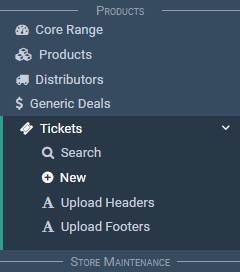
Select 'Tickets' > 'New'.
Notice the 'Printlist Header' section.
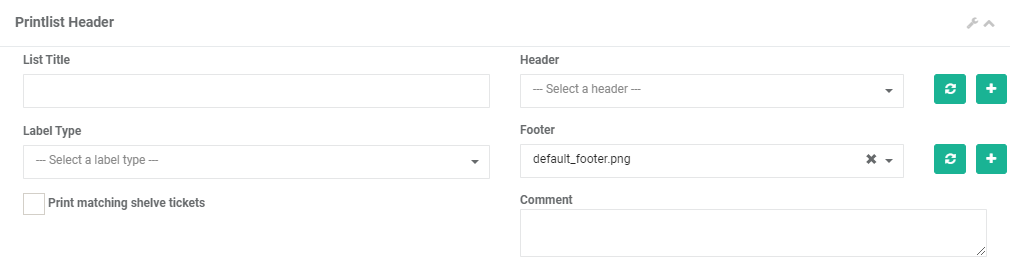
Enter a title in the 'List Title' field.
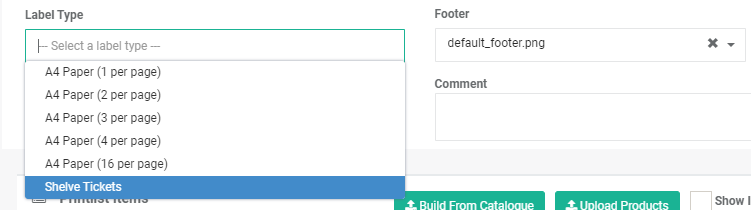
Select an item from the 'Label Type' selector.
Here you can select the number of tickets that appear on one A4 page.
There's also an option to print 'Shelf Tickets'.
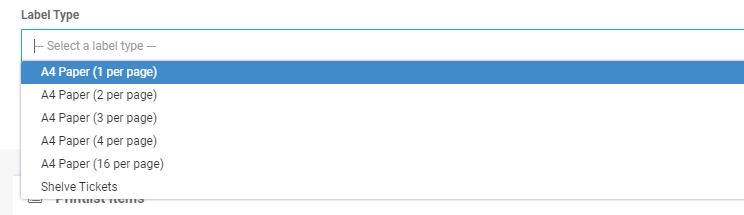
Select the 'Print matching shelf tickets' checkbox.
This is optional.
In addition to the normal A4 printout, a 'Shelf Tickets' printout is created.

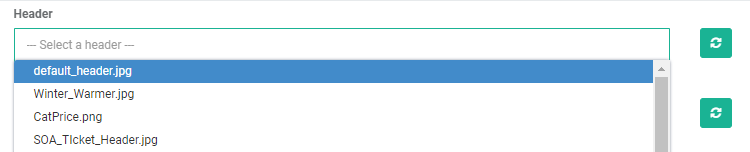
Select an item from the 'Header' selector.
This is a list of header images.
To add more images to the list see Uploading Header Images.
Next, select an item from the 'Footer' selector.
This is a list of footer images.
To add more images to the list see Uploading Footer Images.

Enter text into the 'Comment' field.
This is an optional field.

At this point you can save the print-list.
Select the 'Save' button.

The next step is to add products to the print-list.
Adding Products
Locate the 'Printlist Items' section.
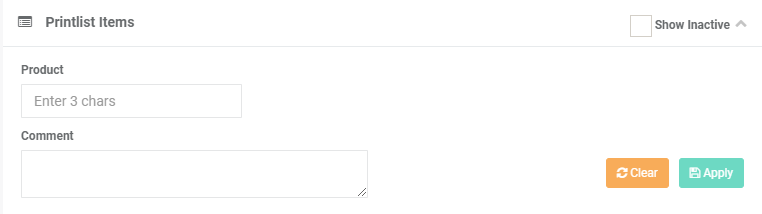
Enter a model number into the 'Product' selector.
Note
When searching for products, the default is to display active products only. To include inactive products, select the 'Show Inactive' checkbox.

Select the product from the list.

Notice three fields appear:
- Price Type
- MIF Rate
- Price
Set a value for all three.
The 'Price Types' are:
- GO
- Catalogue
- Custom

The 'MIF Rate' options are:
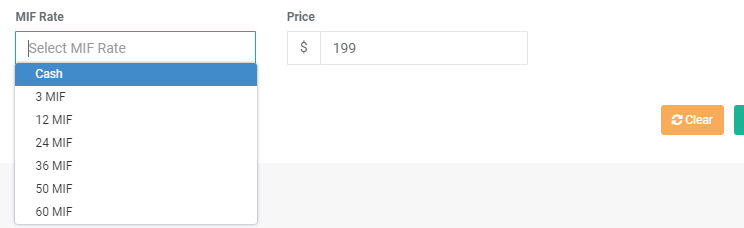
Enter a price into the 'Price' field.

Enter text into the 'Comment' field.
This is an optional field.
Select 'Apply'.
Notice the product is listed in the print-list.

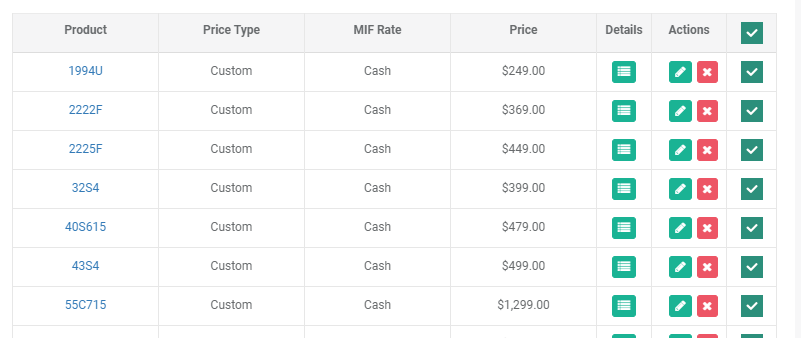
Viewing Product Details
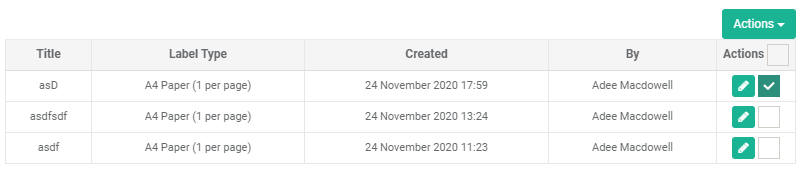
Locate the list of print-list items.
Locate the product.
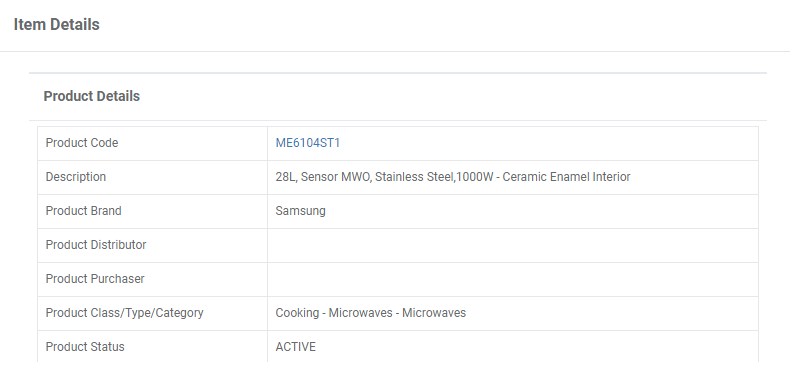
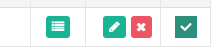
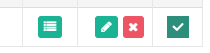
Select the 'Details Icon'.

View the details pop-up.
Deleting Products
Locate the list of print-list items.
Locate the product.
Select the 'Delete Icon'.
Notice the line disappears from the list.
Editing Products
Locate the list of print-list items.
Locate the product.
Select the 'Edit Icon'.
Notice the line is loaded into the input fields.

Make your changes.
Select 'Apply'.
Notice the updated line in the print-list.

Printing A Print-List
Locate the list of print-list items.
Select the lines/products you want to print.

Tip
There's a way to choose all.
Select the checkbox at the top right of the table.

Locate the 'Print' button at the bottom of the screen.
Select 'Print'

Your print-list is displayed in a new browser tab.

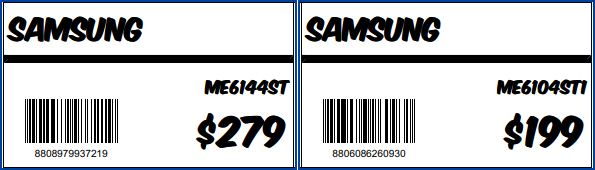
Printing Shelf Tickets
Follow the steps at Creating Print-lists.
Be sure to select 'Shelf Tickets'.
This will print Shelf tickets instead of the standard A4 prints.
The printouts look like this.
Tip
You can print standard A4 and shelf tickets at the same time.
Two tabs will appear.
Select the 'Print matching shelf tickets' checkbox.
The Search Screen
This section describes how to use the print-list search screen.
Searching For Print-lists
In the main menu on the left of screen, go to the Products section.
Select 'Tickets' > 'Search'.
Notice the 'Printlist Search' section.
Here you can use a filter to search for print-lists.
You can filter by:
- Title
- Product
- Date
- Status
Enter your filter values.
Select the 'Search' button.

Your results are displayed.

Deleting Print-lists
In the main menu on the left of screen, go to the Products section.
Select 'Tickets' > 'Search'.
Notice a list of print-lists at the bottom of the 'Printlist Search' section.
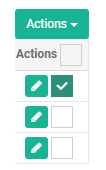
Locate the 'Actions' column.
Select a print-list by checking the checkbox.
Note
You can select multiple print-lists.
You can select all by checking the top checkbox.
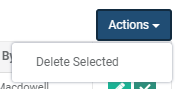
Select the 'Actions' button.
Select 'Delete Selected'.
Notice the items are removed from the print-list.

Uploading Print-list Products
This section describes how to upload products for your print-lists.
In the main menu on the left of screen, go to the Products section.
Select 'Tickets' > 'New'.
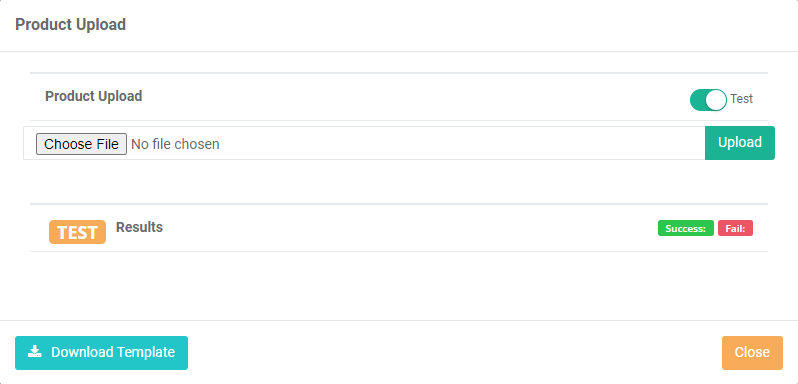
Select the 'Upload Products' button.

A pop-up will appear like this.
Select the 'Download Template' button.
The template will be saved to your pc.

Open the file.
The template looks like this.

Remove the template product and add your own.
Save the file.
Select the 'Choose File' button.

Select your file.
Note
The uploader only accepts CSV format.
Make sure you're in test mode.

Select the 'Upload' button.

Notice the upload results section.
- Successful rows (green)
- Errors (red)
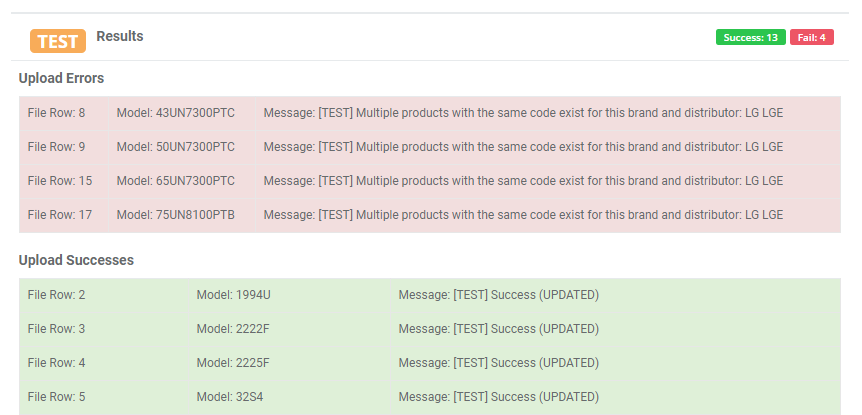
If you see errors:
-
Try to fix the errors listed
-
Then, try the upload again
-
Repeat until you see no more errors
Turn off the test switch.

This takes you to live mode.
Notice the status changes to 'Live'.
Select the 'Upload' button again.
Notice the upload results section.
Your upload is complete.
Notice the uploaded products in the print-list.

Select the 'Print' button to print the list.

Creating Print-lists From Catalogues
This section describes how to use catalogues to create print-lists.
Build From Catalogue
Here you'll see the standard way to create print-lists from catalogues.
Build Via Editable CSV Files is the alternative way.
Select 'Tickets' > 'New'.
Select the 'Build From Catalogue' button.
A pop-up will appear like this.
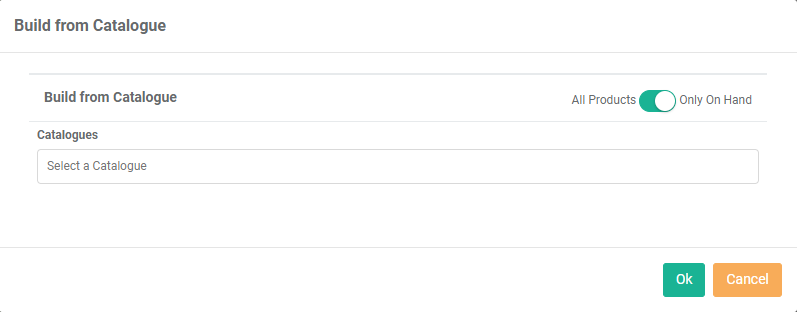
Use the switch to filter by 'All Products' or 'Only On Hand'.

Select a catalogue from the list.
Then select 'OK'.

Notice the catalogue items are now in your print-list.

Build Via Editable CSV Files
Here you'll see an alternative way to create print-lists from catalogues.
The standard way is to Build From Catalogue.
There you have no choice which products are included.
Use the following steps to have control over the upload.
For example, you may want to:
- Add extra products not listed in the catalogue
- Remove products listed in the catalogue
- Modify prices
In this first step, we'll download a catalogue report.
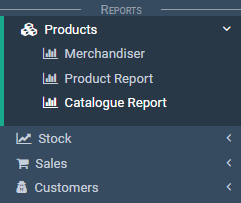
In the main menu on the left of screen, go to the Reports section.
Select 'Products' > 'Catalogue Report'.
In the 'Catalogue' section:
- Select the catalogue drop-down menu
- Select the catalogue you wish to print
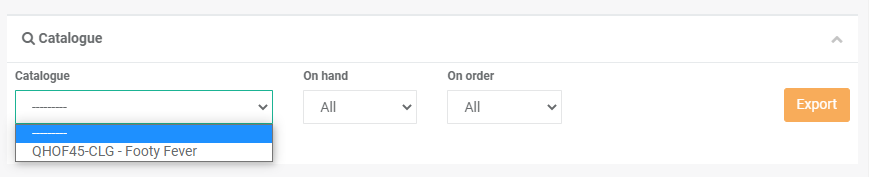
On the 'On hand' field, you can choose to filter the report to only show:
- Stock that's on hand
- Not on hand
- Or to show everything
In our example, we'll leave it as the default option of 'ALL'.

Select the 'Export' button.
This will download the catalogue report CSV to your PC.
In the main menu on the left of screen, go to the Products section.
Select 'Tickets' > 'New'.
In the 'Printlist Header' section fill out all the details for the print-list.
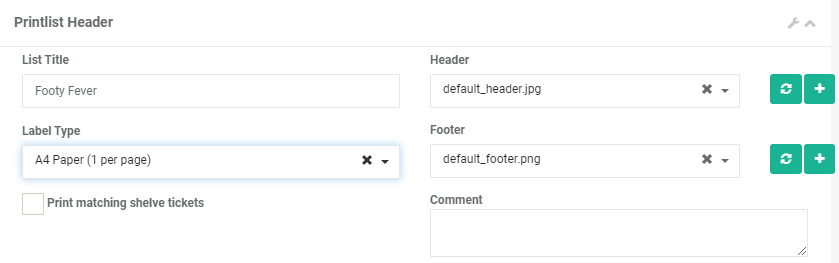
Then select the 'Save' button.

Once you have saved the print-list, go to the 'Printlist Items' section.
Select the 'Upload Products' button.

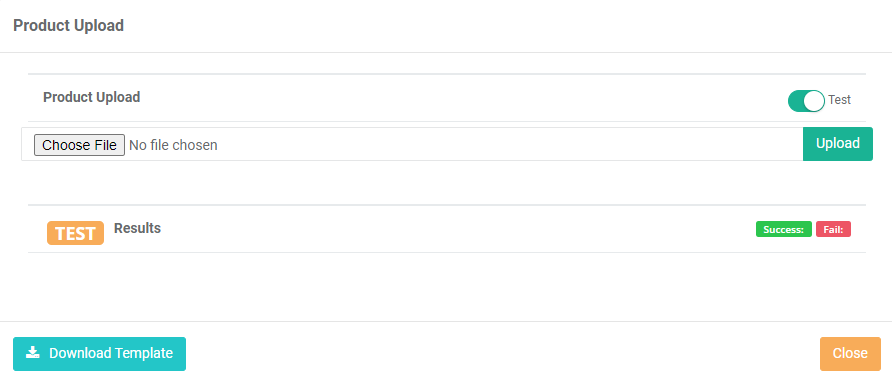
The product upload pop-up will appear.
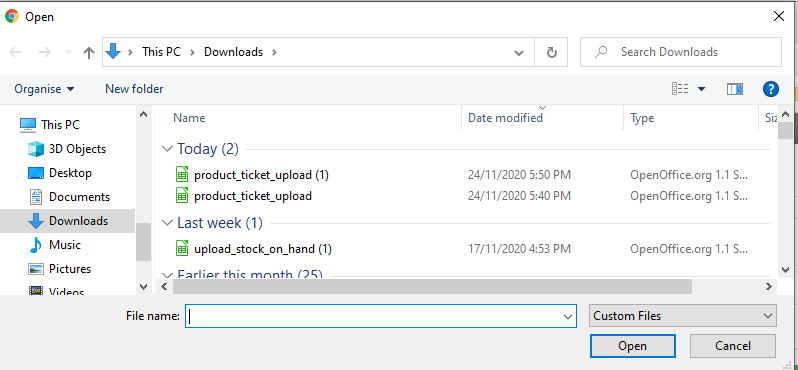
Select the 'Choose File' button to select a file.
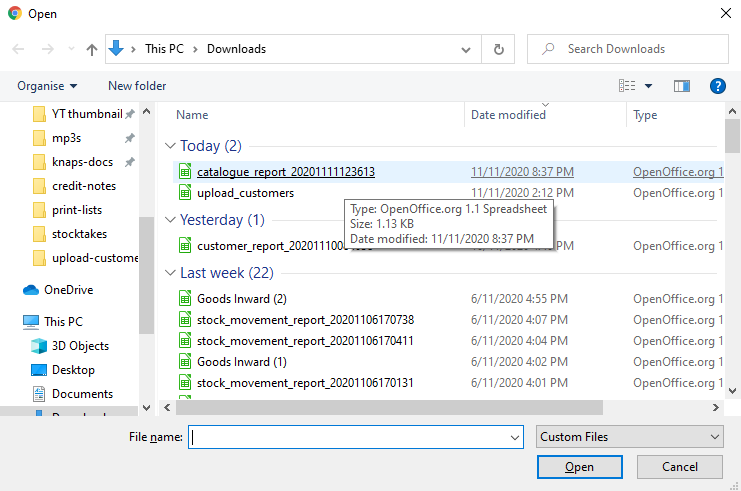
We'll use the catalogue report CSV that we downloaded earlier.
Navigate to the catalogue report and select 'Open'.
Note
The uploader only accepts CSV format.
Make sure you're in test mode.
Select the 'Upload' button.
Notice the upload results section.
- Successful rows (green)
- Errors (red)
If you see errors:
-
Try to fix the errors listed
-
Then, try the upload again
-
Repeat until you see no more errors
Turn off the test switch.
This takes you to live mode.
Notice the status changes to 'Live'.
Select the 'Upload' button again.
Notice the upload results section.
Your upload is complete.
Select 'Close'.
Now you're back on the print-list screen.
Notice the products from the catalogue are loaded on the page.
Then you can select the 'Print' button to print the uploaded tickets.

Related Tutorials 
Products